
Introduction
Recently, my MSI Crosshair 17 experienced a serious storage problem involving its Seagate 1TB HDD.
This is the laptop I use for everyday computing, development, and malware testing inside virtual machines.
The problem began with unusual symptoms:
- Continuous beeping immediately after powering on the laptop.
- Unusually slow Windows startup.
- My secondary D: drive suddenly disappearing.
- Windows reporting the HDD as "Unknown / Not Initialized".
After investigating the issue, I isolated the malfunctioning HDD and decided to replace it with a Crucial BX500 1TB SATA SSD.
In this article, I'll explain what happened, how I investigated the problem, how I replaced the storage device, and what the verification results revealed.
This article documents my personal hardware troubleshooting experience. It doesn't claim that SSDs are perfect or that HDDs are universally unreliable. Hardware specifications, reliability, and lifespans can vary.
The Problem: A Beeping HDD
The first warning sign was a continuous beeping sound immediately after pressing the laptop's power button.
The pattern sounded approximately like this:
BEEP → 1-second silence → BEEP → Repeat
At first, the source wasn't completely clear.
I considered several possibilities, including hardware initialization problems and connection issues.
However, the situation became more concerning when Windows started loading unusually slowly.
The Missing D: Drive
After Windows reached the desktop, I opened File Explorer and discovered that my secondary D: drive had disappeared.
Only the Windows C: drive was visible.
I opened Disk Management to investigate further.
Windows detected the secondary disk as:
Disk 0 — Unknown / Not Initialized
This was an important discovery.
The disk was no longer accessible through its original partition structure.
If an existing drive containing important files unexpectedly appears as "Not Initialized," don't immediately initialize or format it. Doing so can complicate data recovery.
Investigating the HDD
The affected storage device was a Seagate Mobile HDD 1TB, operating at 5400 RPM through a SATA connection.
The drive had previously experienced file corruption and connection-related problems.
During an earlier incident, I removed and reseated the HDD, which temporarily restored its functionality.
However, the problem eventually returned.
Isolating the Problem
I decided to disconnect the malfunctioning HDD and check whether the laptop could operate normally without it.
After removing the HDD, the laptop worked normally again.
The continuous beeping stopped, and the startup problems disappeared.
This strongly indicated that the HDD or its connection was responsible for the observed symptoms.
Although the behavior suggested a serious storage hardware problem, I didn't establish the exact internal mechanical failure mechanism.
Why I Didn't Open the HDD
During my investigation, I encountered tutorials suggesting that opening the HDD enclosure and manually repositioning internal mechanical components could restore functionality.
I decided not to attempt that procedure.
Mechanical HDDs contain delicate components, including magnetic platters and read/write heads.
Opening their sealed enclosures without suitable recovery equipment can introduce contamination and cause additional damage.
Instead, I preserved the HDD without opening its internal assembly.
Choosing the Replacement SSD
I decided to replace the malfunctioning HDD with a Crucial BX500 1TB SATA SSD.
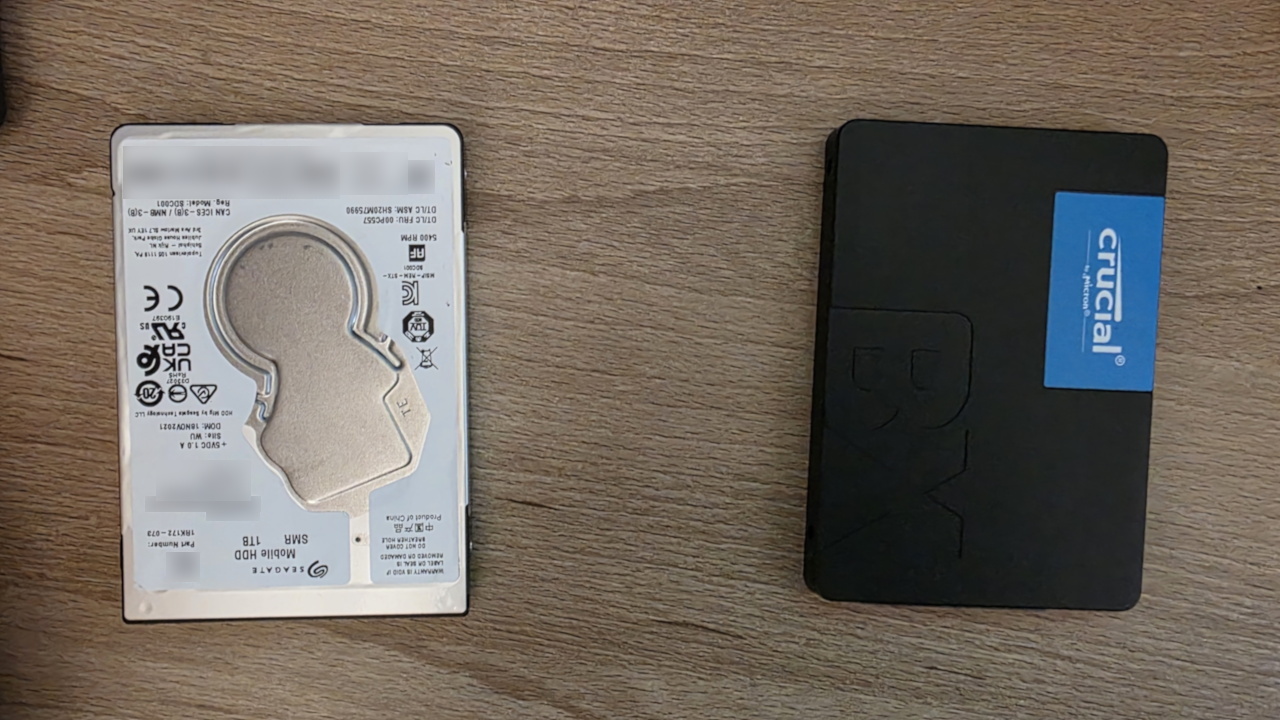
The retired Seagate 1TB HDD (left) and its Crucial BX500 1TB SATA SSD replacement (right).
Why the Crucial BX500?
My objective was straightforward:
Replace the failed D: drive with a compatible and functional storage device.
The BX500 offered the characteristics I needed:
- 1TB storage capacity.
- 2.5-inch form factor.
- SATA III interface.
- No mechanical moving parts.
- Suitable performance for everyday applications and file storage.
My laptop already had an NVMe SSD serving as the Windows C: drive.
Therefore, the new BX500 was intended to serve as my secondary Data (D:) drive.
I didn't need the fastest premium SSD available. I needed a suitable replacement for the failed HDD.
A budget-friendly SSD isn't automatically a low-quality SSD. Evaluate storage hardware according to its specifications, intended workload, available budget, and actual operating behavior.
Installing the Crucial BX500
After purchasing the replacement SSD, I opened the laptop's bottom cover to access the original HDD location.
The existing drive had been secured using an adhesive-based mounting arrangement rather than a conventional removable mounting bracket.
This required careful inspection of the available space and mounting arrangement.
I positioned the new BX500 in the original 2.5-inch storage location.
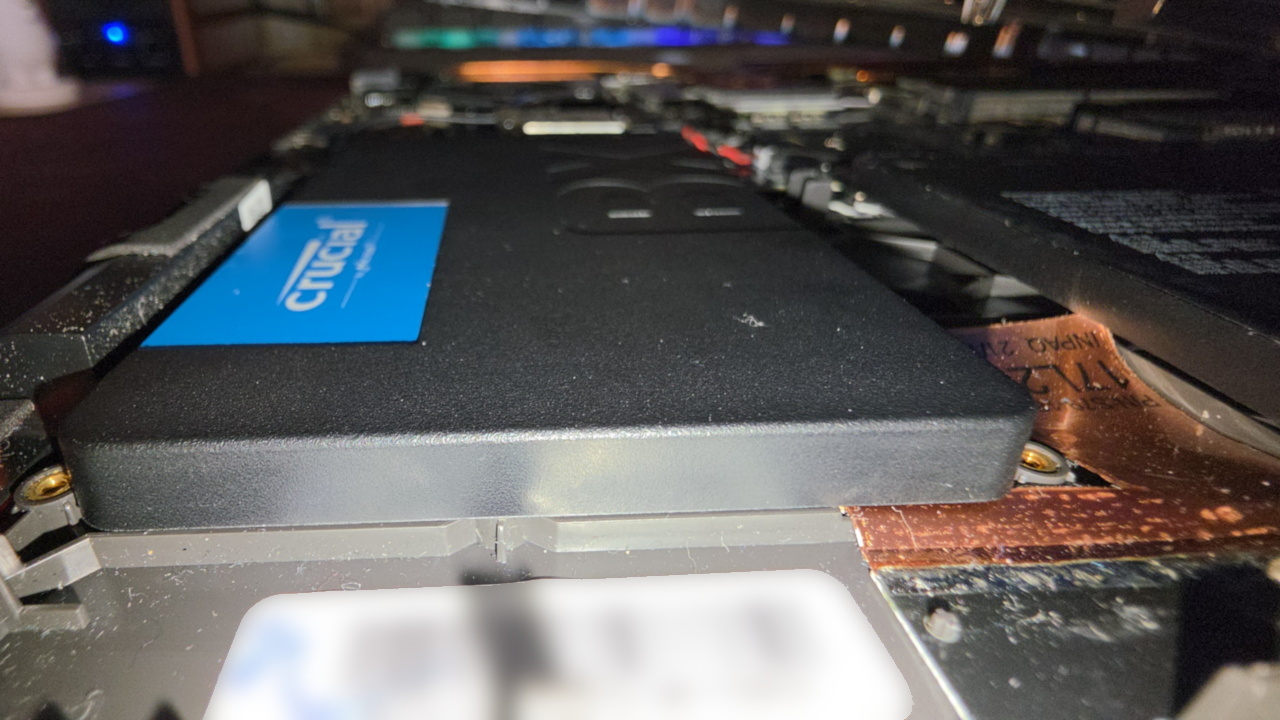
The Crucial BX500 positioned inside the MSI Crosshair 17 during the installation process.
The SSD physically fit in the available space.
After completing the installation and reconnecting the necessary components, I powered on the laptop.
Initial Detection
Windows successfully detected the newly installed SSD.
Its reported capacity was approximately 931.51 GiB, corresponding to its advertised 1TB capacity.
This was a positive initial result, but the drive still needed to be initialized and configured.
Configuring the New D: Drive
I opened Windows Disk Management and configured the new SSD.
The settings were:
| Setting | Configuration |
|---|---|
| Disk | Disk 0 |
| Partition style | GPT |
| Volume size | 953852 MB |
| Drive letter | D: |
| File system | NTFS |
| Allocation unit size | Default |
| Volume label | Data |
| Quick format | Enabled |
| File compression | Disabled |
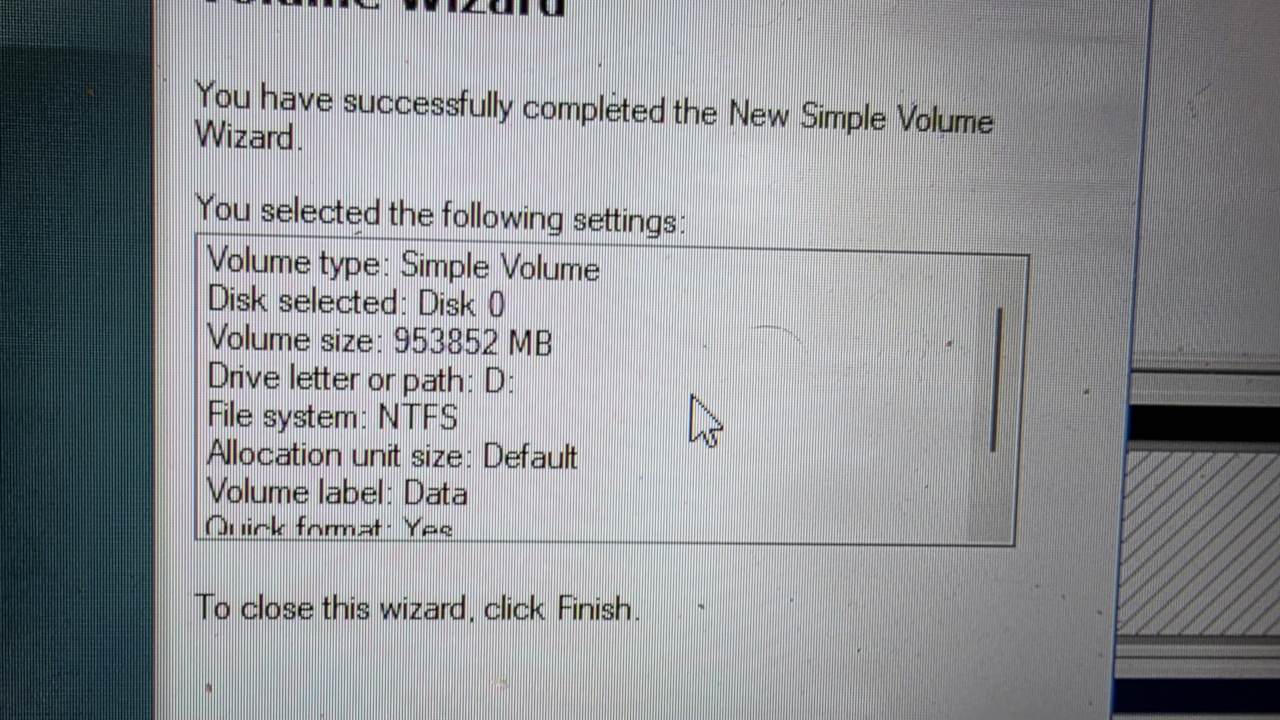
The Windows New Simple Volume Wizard showing the selected configuration for the new Data (D:) drive.
After completing the wizard, the SSD became accessible through File Explorer.
The new D: drive was ready for everyday use.
Initializing and formatting were appropriate in this case because the Crucial BX500 was a new, empty SSD. These operations should not be applied to an existing drive containing data that needs to be preserved.
Verifying the SSD's Health
After configuring the drive, I used CrystalDiskInfo to inspect its reported health information.
The initial results were positive.
The SSD was detected through SATA III and reported:
- Health: Good (100%).
- Temperature: Approximately 30–33°C.
- Interface: SATA/600.
- TRIM: Supported.
- Reallocated NAND blocks: 0.
- Reported uncorrectable errors: 0.
- UDMA CRC errors: 0.
These results supported the conclusion that the SSD was operating normally during initial verification.
However, a healthy SMART report isn't a guarantee of unlimited hardware lifespan.
It represents the drive's reported condition at the time of inspection.
Restoring Applications and Data
Replacing the HDD was only part of the recovery process.
Many applications and development tools had previously been installed on the old D: drive.
Fortunately, I had already backed up approximately 180GB of important data to a separate Samsung 2TB SSD.
I also created a list of applications that needed to be reinstalled.
Application Recovery
The reinstallation process included several categories of software:
Development tools:
- Visual Studio.
- Android Studio.
- Git.
- Node.js and npm.
- Python.
- Rustup.
- PostgreSQL and pgAdmin.
- Other development utilities.
Media and productivity applications:
- DaVinci Resolve.
- OBS Studio.
- Audacity.
- HandBrake.
- Paint.NET and its plugins.
- Other apps
Virtualization:
- VirtualBox and its virtual machines.
- VMware.
- Debian WSL.
I also restored my own applications, including I18N Translator.
My Recovery Workflow
Rather than attempting to reconstruct every application exactly as it existed before the HDD failure, I followed a simpler process:
Install → Recover or Recreate → Verify → Complete
This involved three approaches:
- Recovering: Restoring files and configurations from available backups.
- Restarting from scratch: Recreating applications or configurations when backups weren't available.
- Verification: Checking that the restored environment functioned correctly.
The result wasn't necessarily identical to the previous software environment, but it restored the functionality I needed.
Results After Recovery
After restoring approximately 180GB of important data and reinstalling my applications, I checked the SSD's reported health again.
CrystalDiskInfo displayed the following results:
| Metric | Result |
|---|---|
| Health status | Good (100%) |
| Temperature | 33°C |
| Total host writes | 322GB |
| Power-on hours | 5 hours |
| Reallocated NAND blocks | 0 |
| Uncorrectable errors | 0 |
| UDMA CRC errors | 0 |
A later verification showed approximately 341GB of host writes, with the reported health remaining at 100%.
The recovery workload had completed without any reported critical storage errors.
At one point following the restoration, approximately 698GB of free space remained on the new D: drive.
My Final Storage Configuration
| Storage device | Purpose |
|---|---|
| Existing NVMe SSD (C:) | Windows and system-related workloads |
| Crucial BX500 1TB SATA SSD (D:) | Applications, SDKs, coding projects, and data |
| Samsung 2TB external SSD | Backups and recovery |
| Retired Seagate 1TB HDD | Offline preservation |
For the external Samsung SSD, I also purchased an ORICO USB enclosure and retained my existing USB-to-SATA adapter as a fallback connection method.
Things to Keep in Mind
1. Backups Matter
My existing backup significantly reduced the amount of data I needed to recover from the malfunctioning HDD.
Backups should ideally be preserved independently of the drive being repaired or replaced.
2. Diagnose Before Replacing
A missing drive doesn't automatically establish that its internal hardware has failed.
Connection problems, controllers, and partition corruption can produce similar symptoms.
In my case, the combination of repeated corruption, persistent beeping, failed detection, and successful laptop operation after HDD removal provided strong evidence that the HDD or its connection was responsible.
3. Budget-Friendly Doesn't Mean Useless
The Crucial BX500 is an entry-level SATA SSD.
That doesn't automatically make it unsuitable for everyday applications, coding projects, and ordinary data storage.
Its suitability depends on the intended workload and actual operating results.
4. Avoid Unnecessary Repairs
Not every hardware repair tutorial is appropriate for every situation.
I chose not to open the HDD's sealed mechanical enclosure because doing so could introduce additional risks to its remaining data.
5. Verification Matters
Hardware detection, SMART health information, and successful read/write operations are useful ways to evaluate a newly installed drive.
These checks establish initial operating conditions, not guaranteed future longevity.
Conclusion
What began as a continuous beeping sound from my MSI Crosshair 17 eventually became a complete secondary-storage replacement project.
After investigating the problem, I isolated the malfunctioning Seagate HDD and replaced it with a Crucial BX500 1TB SATA SSD.
The replacement was successfully detected, configured as D:, and verified through CrystalDiskInfo.
I also restored approximately 180GB of important data and reinstalled the applications needed for my everyday workflow.
The result was a functional dual-SSD configuration without requiring a complete Windows reinstallation.
This experience isn't proof that SSDs are perfect or that HDDs are universally bad.
It's an example of investigating an actual hardware problem, making a practical replacement decision, and verifying the outcome.
Hardware has limitations, and no storage device lasts forever. What matters is understanding the available evidence and choosing an appropriate response.
Watch the Hardware Documentary
The full video demonstrates the troubleshooting, hardware replacement, storage configuration, and verification process.
Found this documentary helpful? Consider sharing it or leaving a comment about your own hardware troubleshooting experiences!
GitHub @ArsenTech · YouTube @ArsenTech · Patreon ArsenTech · ArsenTech's Website